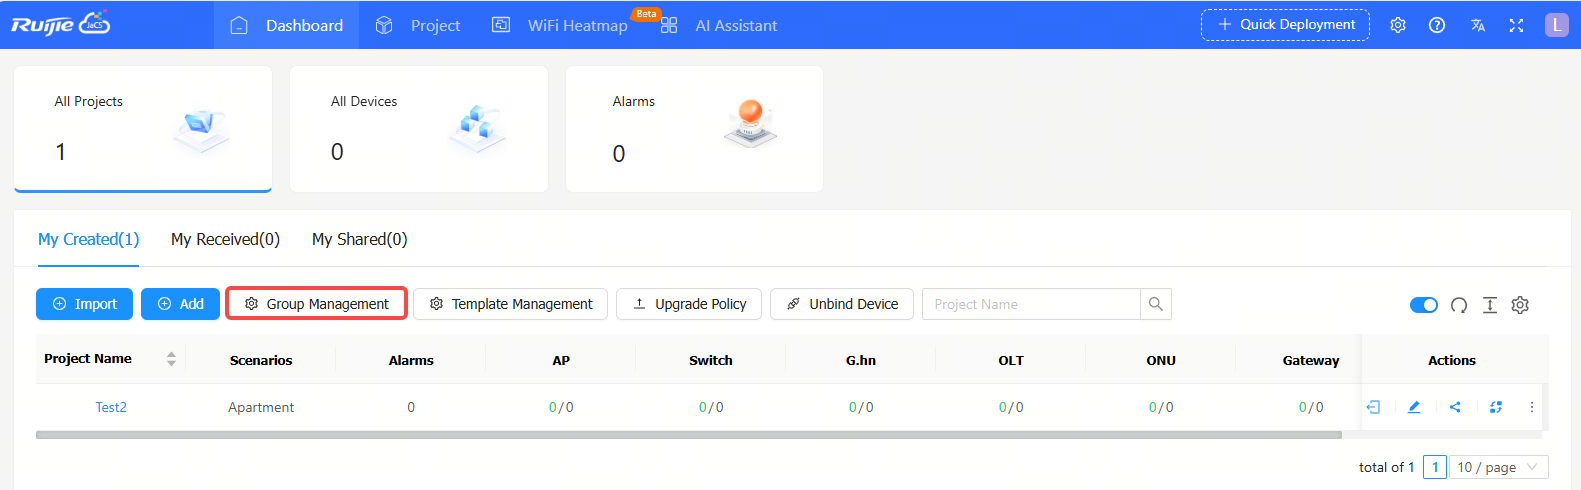
Step 1: Navigate to Dashboard > All Projects > My Created, and then click Group Management.
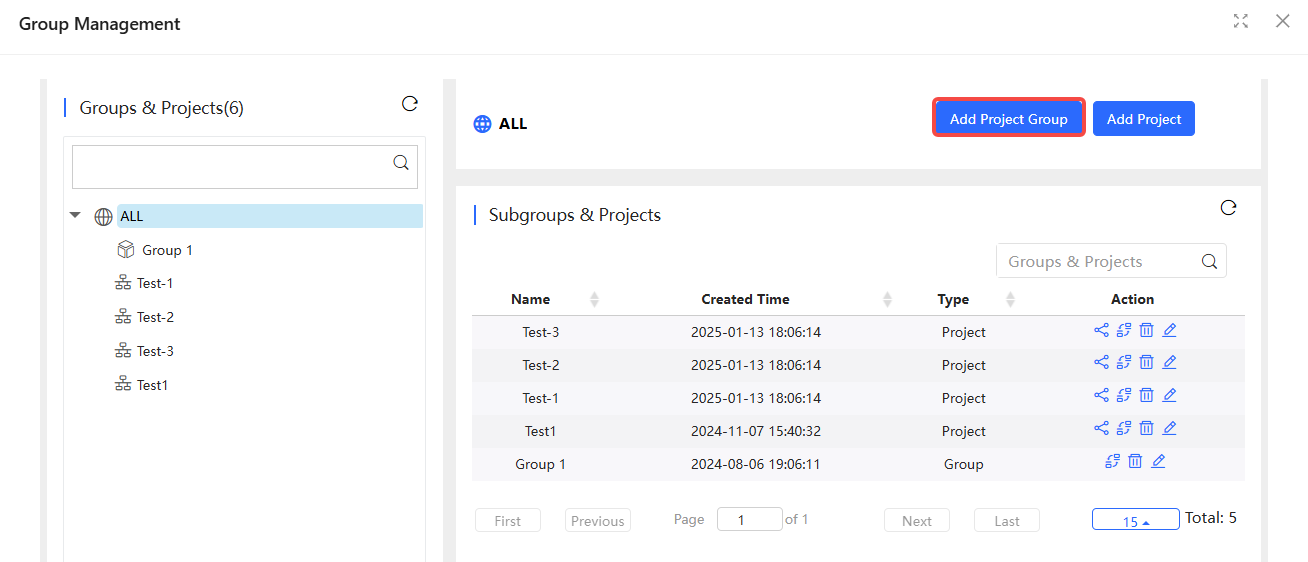
Step 2: Click Add Project Group.
Step 3: Enter a project group name and click OK.
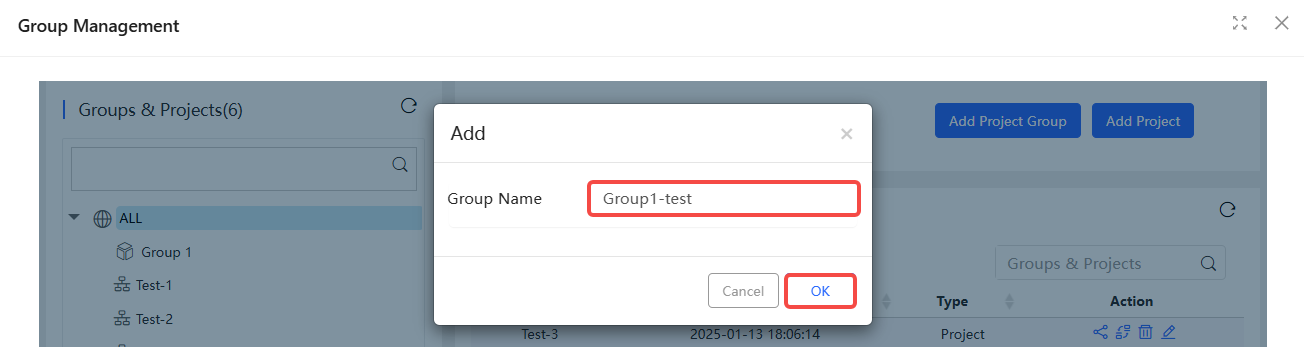
Note: The length of a project group name cannot exceed 256 characters.
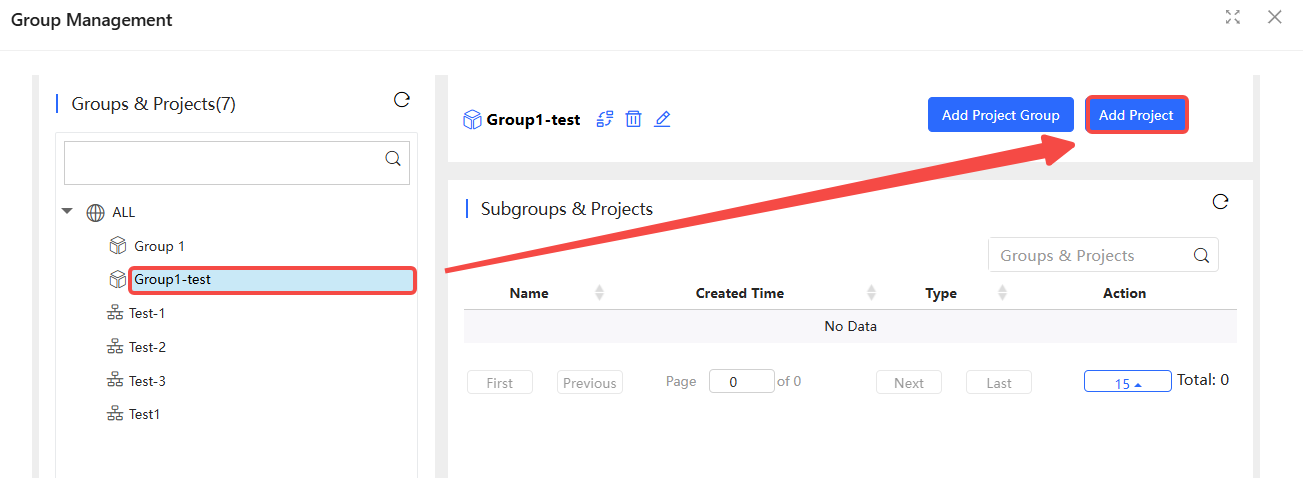
Step 4: After creating a project group, select the project group and click Add Project to add a project to the project group.
Step 5: After setting the basic project information, click Save.
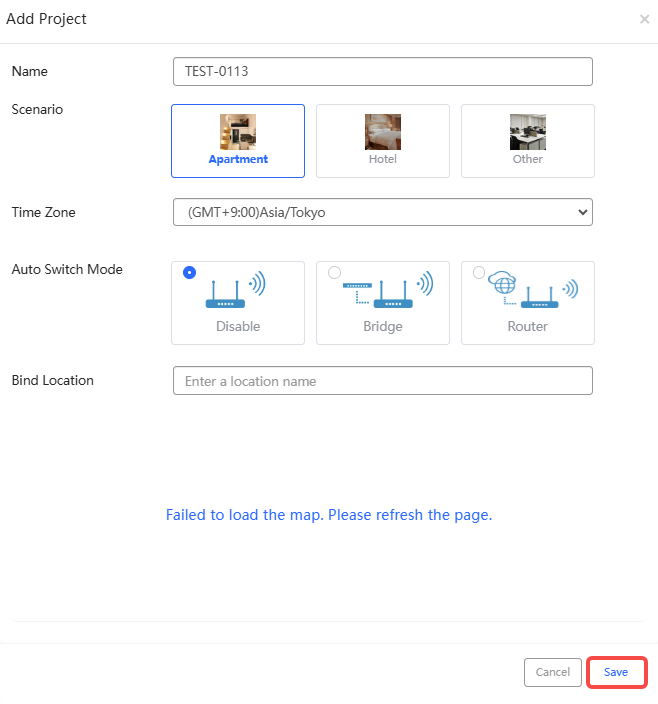
(1) Project Name: (Required) Set the network name. The length of a project name cannot exceed 256 characters.
(2) Scenario: (Required) Set a scenario. Defaults: Apartment; Options: Apartment/Hotel/Others (Note: For hotels and other scenarios, you can set the same SSID and password for all devices imported to the project. For apartment scenario, you can set a different SSID and password for each device imported to the project.)
(3) Time Zone: (Required) Set a time zone. Defaults: (GMT+9:00)Asia/Tokyo
(4) Automatic Switching Mode: (Required) Set a working mode. Defaults: Disable;
Disable: Disabling the automatic switching mode function.
Bridge: After selecting this option, AP devices imported into the project will automatically switch to bridge mode after they go online for the first time.
Router: After selecting this option, AP devices imported into the network will automatically switch to routing mode when they go online for the first time.
(5) Type: Cloud +AP ( Manage AP devices through the cloud.)
(6) Location Binding: After binding the geographic location, the number of terminal devices added to the project will be marked and displayed on the Google map.
全部评论