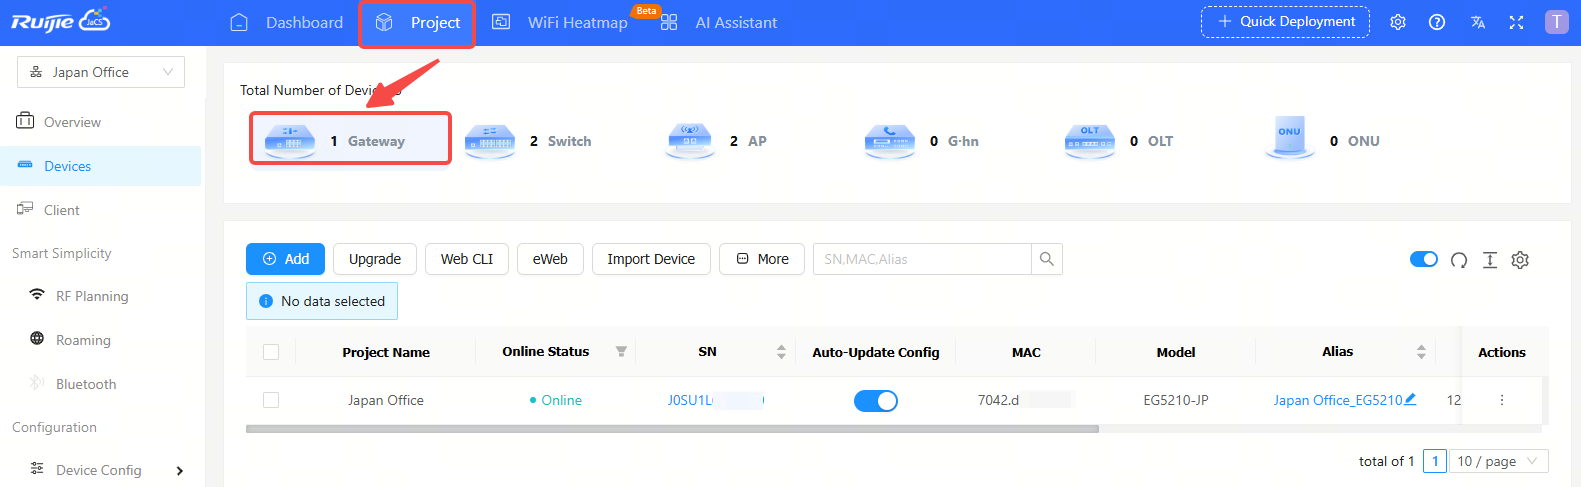
Navigate to Project > Gateway to go to the gateway management interface. After selecting a specific project, you can manage the gateway devices in this project.
Item Description:
(1) Project Name: Displays the name of the project where the gateway is located.
(2) Online Status: Displays the online status of the gateway. The online status of the device includes: Online/Offline/Not Online Yet. Click the filter icon to filter devices by online status.
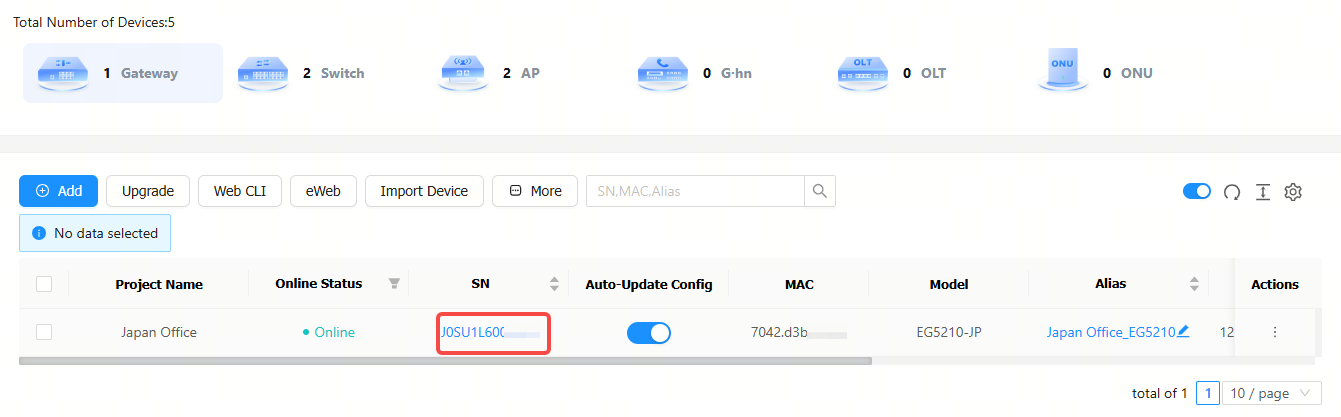
(3) SN: Displays SNs of gateways. Click the SN number of a gateway, you can view its detailed information.
(4) Auto-Update Config: Enable or disable the function of automatically deliver configurations to a gateway via JaCS.
(5) MAC: Displays MAC addresses of gateways.
(6) Model: Displays the models of gateways.
(7) Alias: Displays the aliases of gateways.
(8) MGMT IP: Displays the management addresses of gateways.
(9) Egress IP: Displays egress IP addresses of gateways.
(10) Firmware Version: Displays firmware versions of gateways.
(11) Last See On: Displays the last online time of gateways.
(12) Actions: Click the Delete icon in the Action column, you can remove the gateway from the project.
Button Description:
 : Add button. Click this button to go to the device adding interface.
 : Upgrade button. After selecting the device, click this button to remotely upgrade the device.
 : Web CLI button. Click this button to enter WEB CLI page to deliver configurations to the device.
 : Batch import gateway button. Click this button to add gateways in batches to a project.
 : Click this button to display more operation buttons, including Move to, Delete, and Restart.
 : Refresh button. Click this button manually to refresh the gateway list.
 : Row height adjustment button. Click this button to adjust the row height.
 : Click this button to customize the displayed items in the gateway list.
 : Automatic refresh switch button. The automatic refresh function is enabled by default. When it is enabled, the gateway device list will automatically refresh once every minute.
 : Search box. Supports searching gateways according to their SN, MAC addresses, and aliases.
Click the SN of a gateway in the gateway list to enter its detailed information interface. The detailed interface consists of the following tabs: Port Panel, Basic Information, Overview, WAN, LAN, Configuration, Alarm and Tunnel.
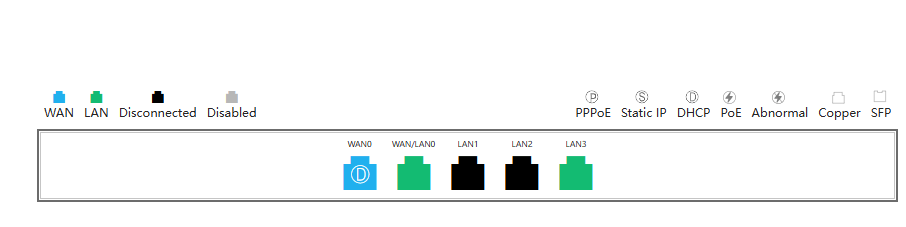
(1) Port Panel
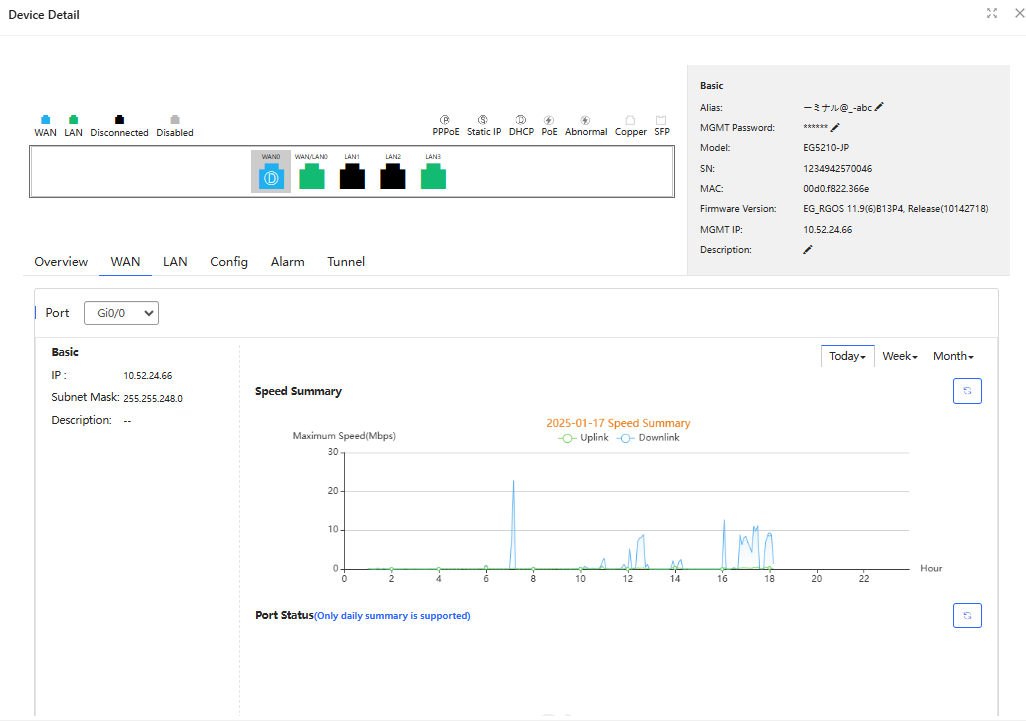
(2) Basic Information
The basic information tab displays the alias, the model, the SN, the MAC address, the firmware version, the management IP and the description of the gateway. Click the edit icon next to the alias, description and management password to edit them.

(3) Overview Tab

(4) WAN
Select a WAN port to view its port information and the rate statistics in a specific time period (today/week/month). Hover the mouse to a certain time, you can view the rate information at that time.
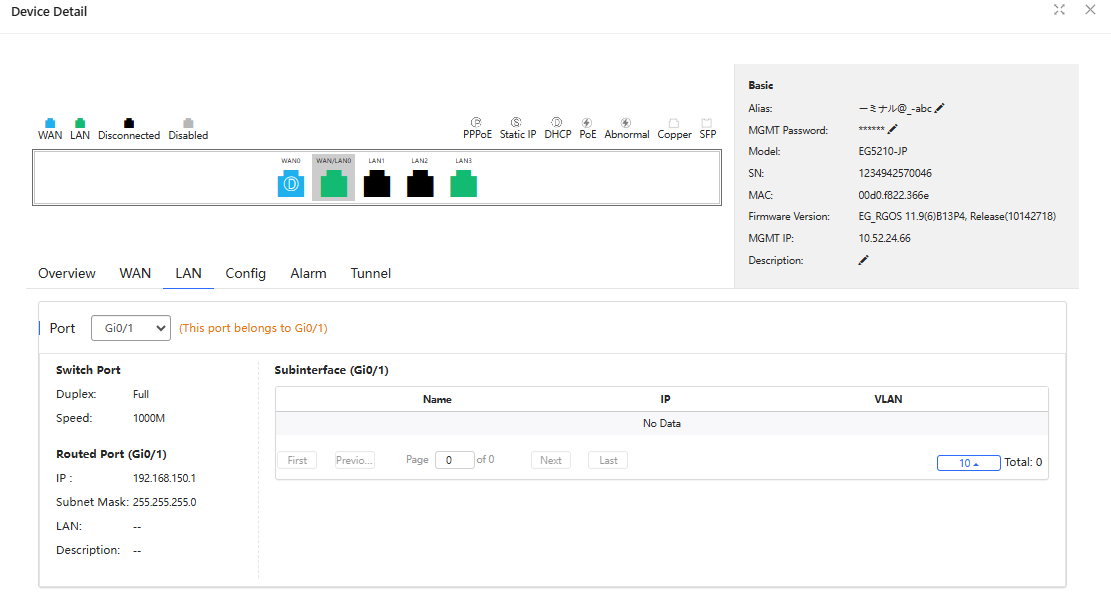
(5) LAN
Select a LAN port to display the corresponding information of its switch port, routing port, and sub-interface.
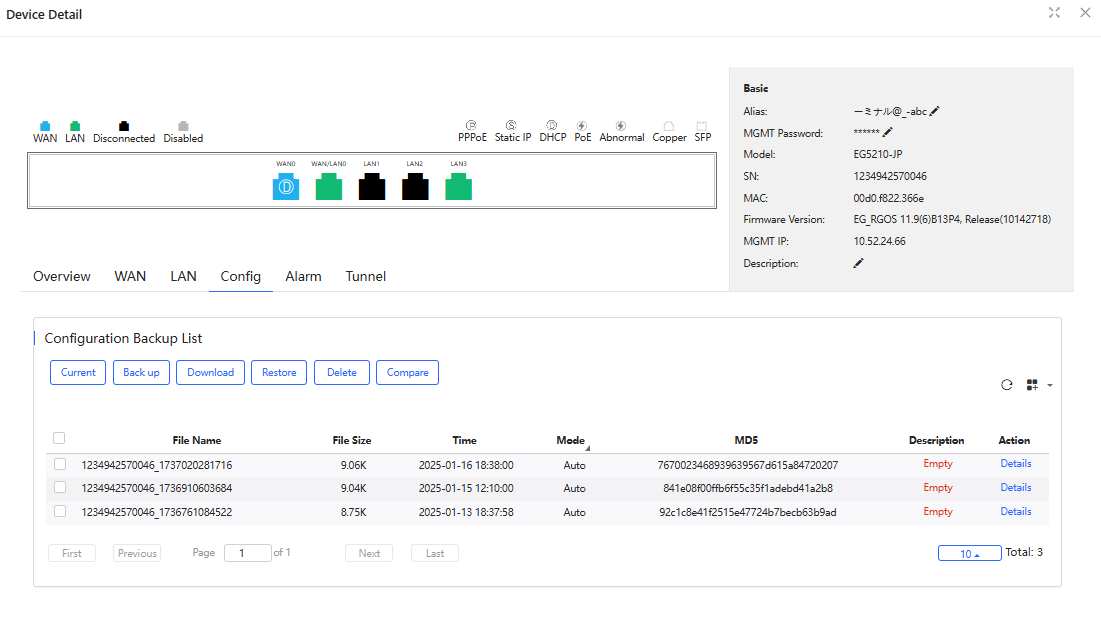
(6) Configuration Tab
In this tab, you can back up the gateway configuration. The information displayed in the backup list includes the configuration file name, file size, backup time, mode, MD5 and description.
 \
\
Button Description:
(1) Current: Click the Current button to display the current configuration of the device. Click the Backup on the current device configuration interface, you can back up the configuration. After the backup, click to refresh the list, and the backed up file will be displayed in the list.
(2) Back up: Configuration backup button. Click the Back up, and click OK in the operation confirmation box to back up the current device configuration. After the backup, click to refresh the list, and the backed up file will be displayed in the list.
(3) Download: download button. Select the configuration file to be exported, click Download, and then click OK in the operation confirmation box. Only one configuration file can be downloaded at a time.
(4) Restore: Backup file restore button. Select a configuration file and click Restore to restore the current configuration file of the device to the selected configuration file. Only one file can be restored at a time.
(5) Delete: Delete button. Select the configuration file to be deleted, click Delete, and when the operation confirmation box appears, click OK.
(6) Compare: Profile comparison button. Select two configuration files to be compared and click Compare to compare them to figure out their differences.
(7) Details: Click the Details in the Action column to view the detailed information.
(8) Description: Click the words in the description column to modify the description.
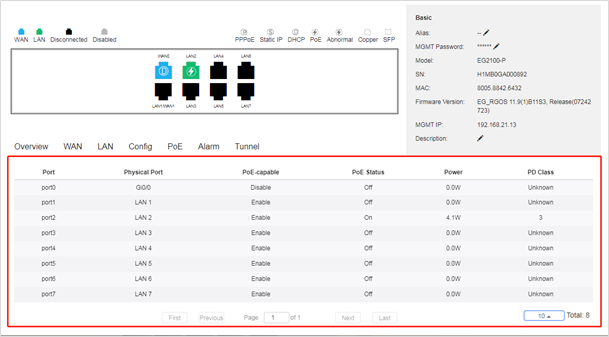
(7) PoE (Only for PoE Gateways)
The PoE tab displays the information of ports, physical ports, PoE-capable status, PoE status, power, and PD classes.
(8) Alarm
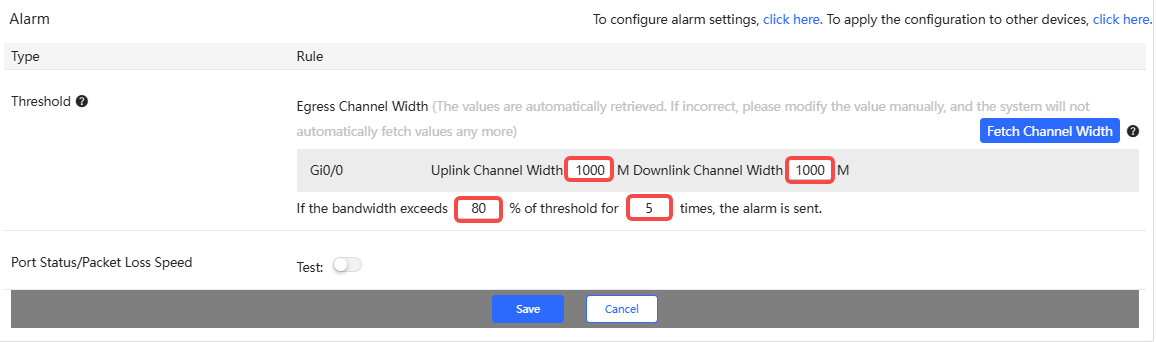
In this tab, you can set alarm conditions, including sending alarms based on the number of times of exceeding the bandwidth thresholds, the number of ping failures, and the packet loss rate within a certain period of time.
If you want to send an alarm based on the number of times of exceeding the bandwidth thresholds, make sure that "Uplink rate above threshold on gateway" and "Downlink rate above threshold on gateway " in the Alarm Settings interface are enabled before configuration. If you want to configure an alarm based on the number of ping failures, make sure that "Abnormal network access on gateway" in the Alarm Settings interface is enabled before configuration.
Note: The Alarm Setting will be supported in the future.
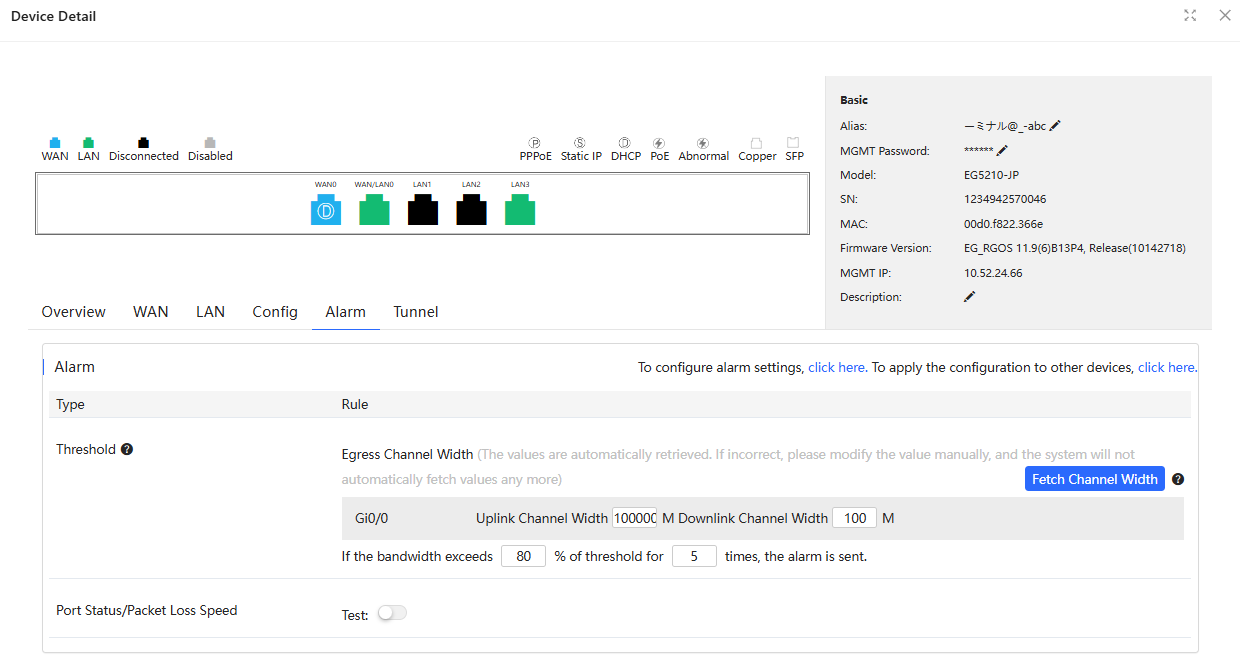
By default, the system sets the upstream bandwidth to 1000 M, the downstream bandwidth to 1000 M, the threshold to 80%, and the number of times of exceeding the thresholds to 5. That is, when the bandwidth exceeds 80% of the total bandwidth for 5 times, an alarm will be generated. After modifying as needed, remember to click Save to save the configuration.
Note: Threshold range: 1-100%; frequency range: 1-6 times.
The specific steps are as follows:
① Enable the Test.
② Set the domain name or IP address. Up to 3 domain names or IP addresses can be entered.
③ Set the number of Ping test failures. The supported number range is 1-10 times.
④ Set the packet loss rate threshold and the number of times within 5 minutes. (Threshold range: 1-100 %; number range: 1-100 times.)
⑤ Click Save to complete the operation.

(9) Tunnels Tab
In this tab, you can create a tunnel. The tunnel types supported by JaCS are Telnet, eWeb, and SSH. Different devices support different types of tunnels. Please refer to the actual device. After selecting the type of tunnel you want to create, click Create Tunnel. The created tunnel will be displayed in the tunnel list.
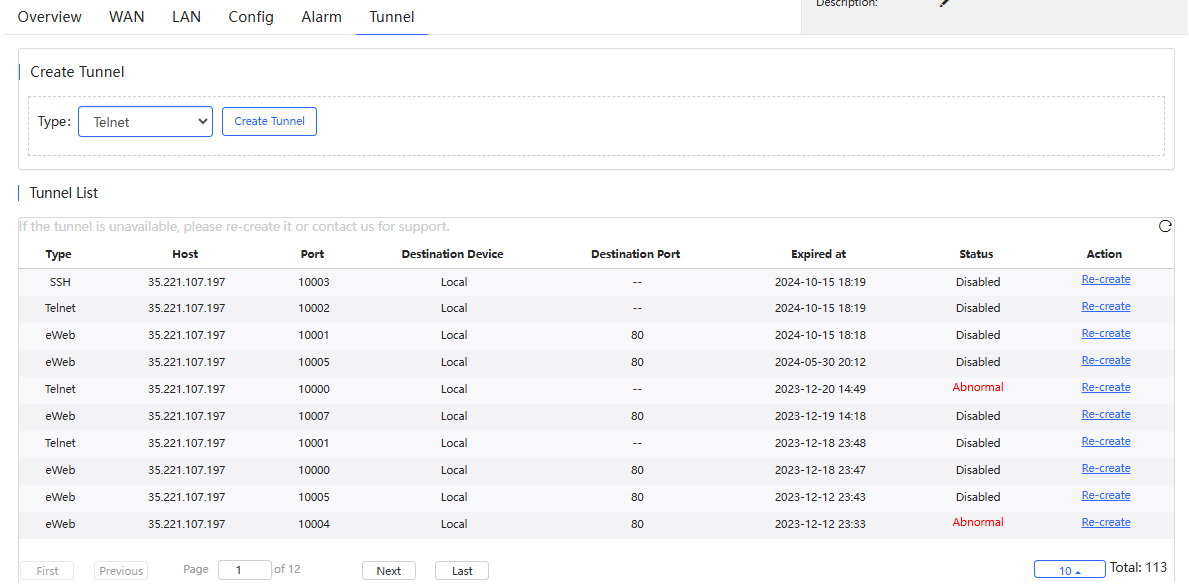
Note: A tenant can create up to 10 tunnels, and up to 5 tunnels can be created for a device. When the number of created tunnels has reached the limit, please close unused tunnels and try again.
全部评论