Ruijie JaCS supports configuring WEB authentication for projects with the scenario set to Hotel or Other.
The specific steps are as follows:
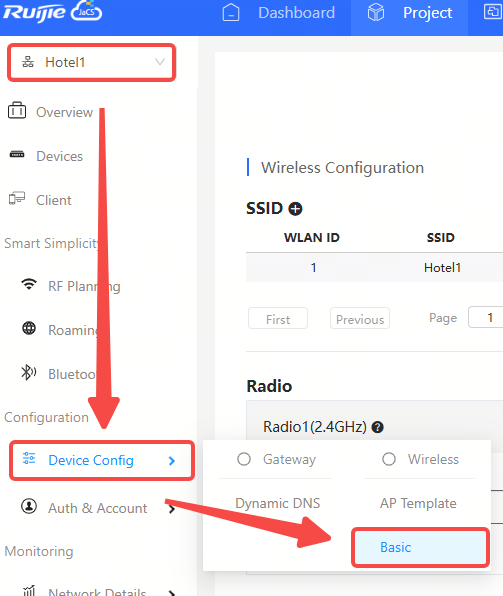
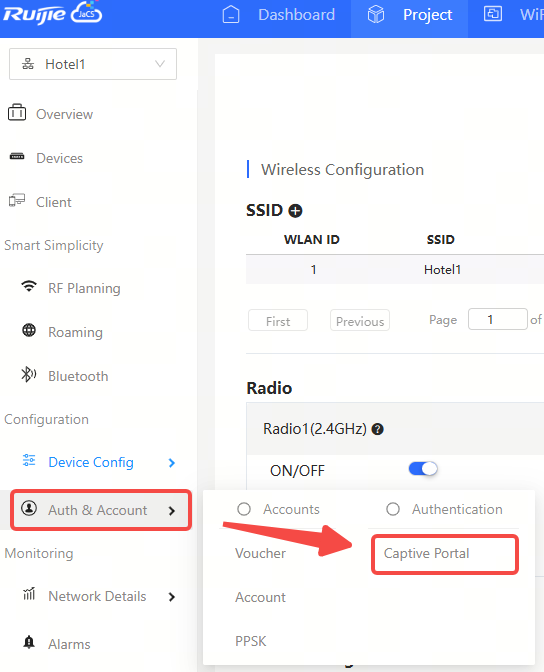
Step 1: After selecting the project to be configured, click Device Config > Basic to enter the SSID creation interface.
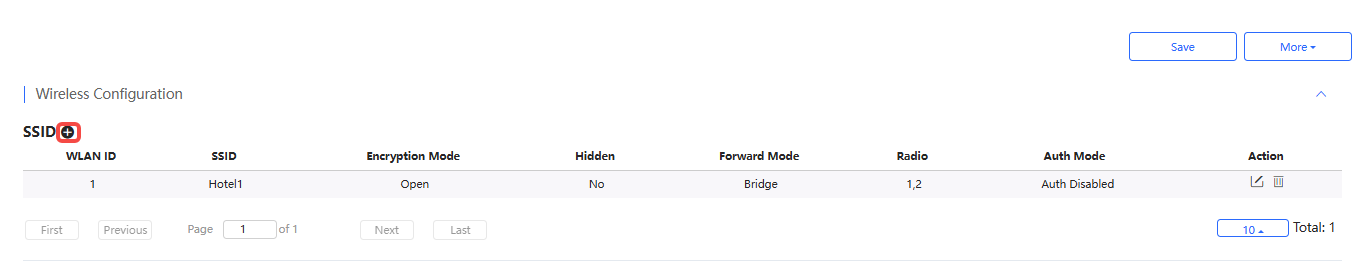
Step 2: Click the + next to SSID to create an SSID. Or click to edit an existing SSID.
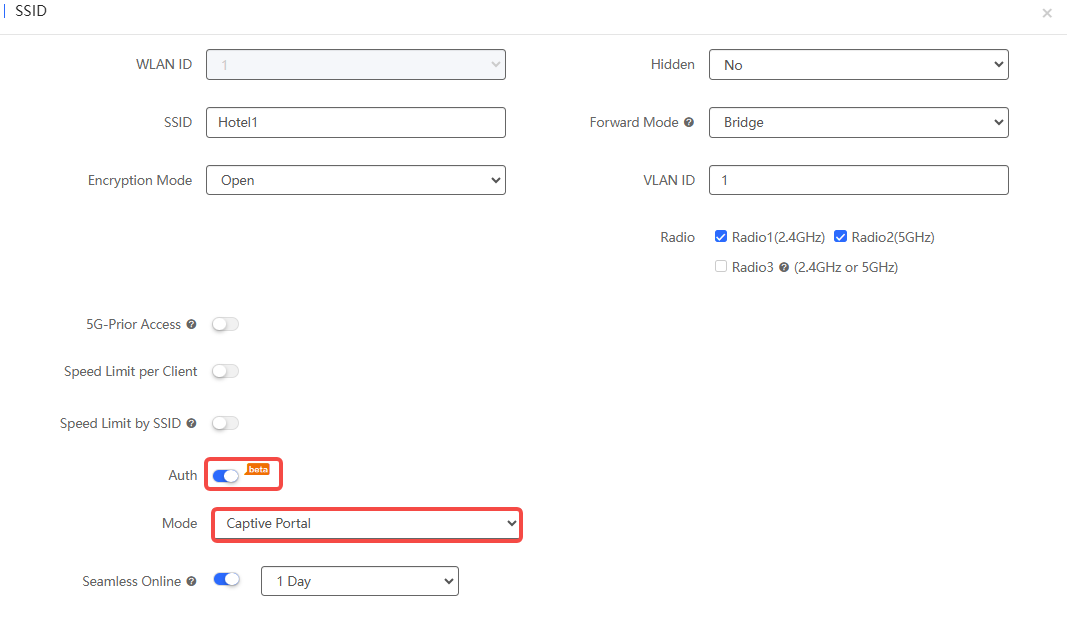
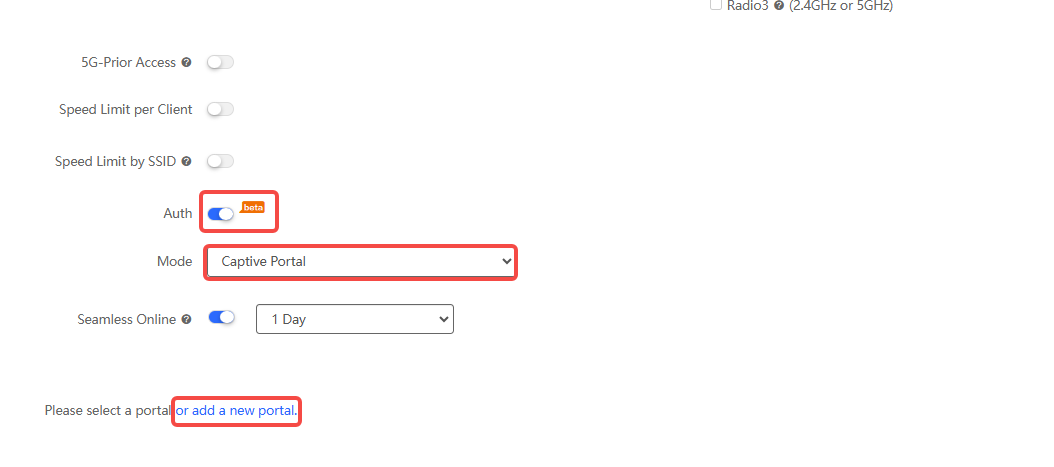
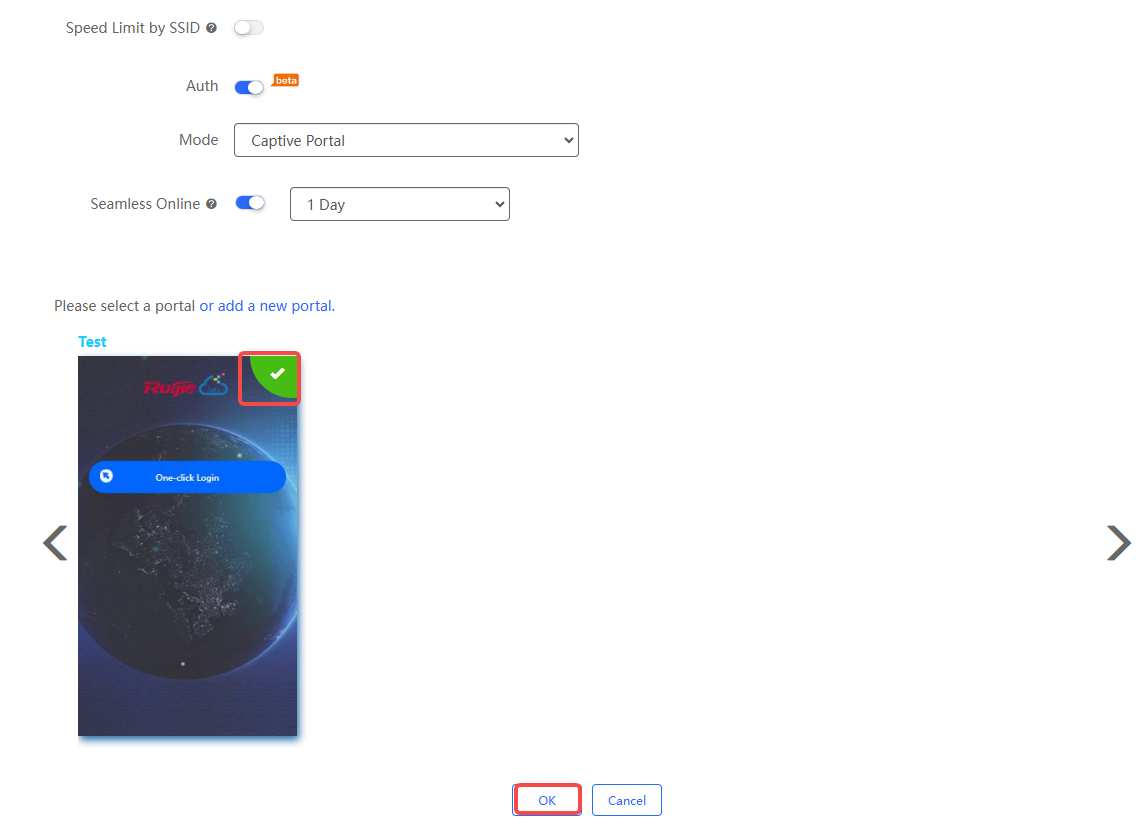
Step 3: Turn on the authentication button, select Captive Portal as the authentication mode, and then click or add a new portal to create a captive portal.
Step 4: Set up the captive portal according to your actual needs.
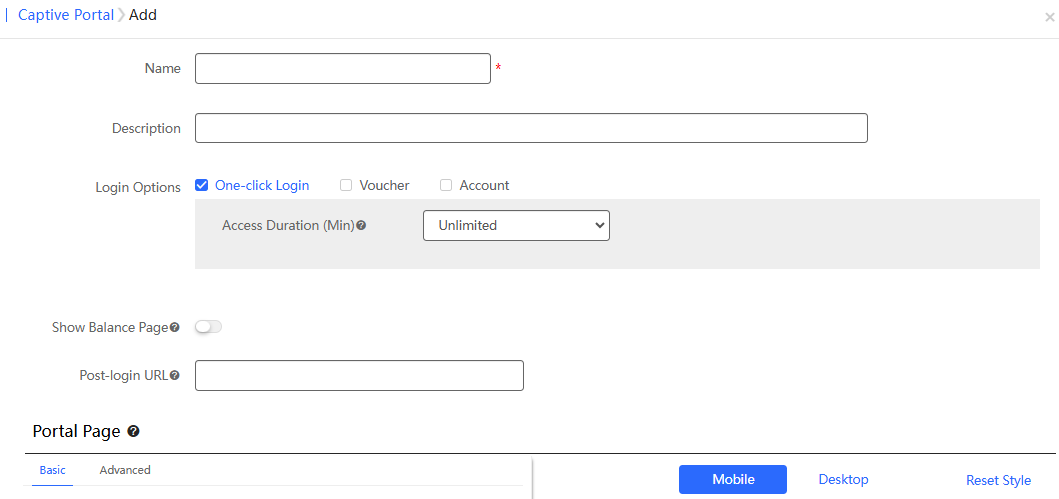
(1) Name: Required. Set the captive authentication portal name.
(2) Description: Optional. Enter the description. Up to 200 characters are supported.
(3) Login Options: Defaults: One-clink Login; Options: One -click Login, Voucher, Account. (Multiple selection is supported.)
(4) Show Balance Page: Defaults: Disabled. When this feature is enabled, the duration, number of times, or data available after portal authentication will be displayed. This function is invalid for gateway authentication.
(5) Post-login URL: Set the URL. It must start with http or https, such as https://www.google.com.
Customize the authentication portal interface. There are two types of interface settings: "Basic Settings" and "Advanced Settings".
Basic settings interface:
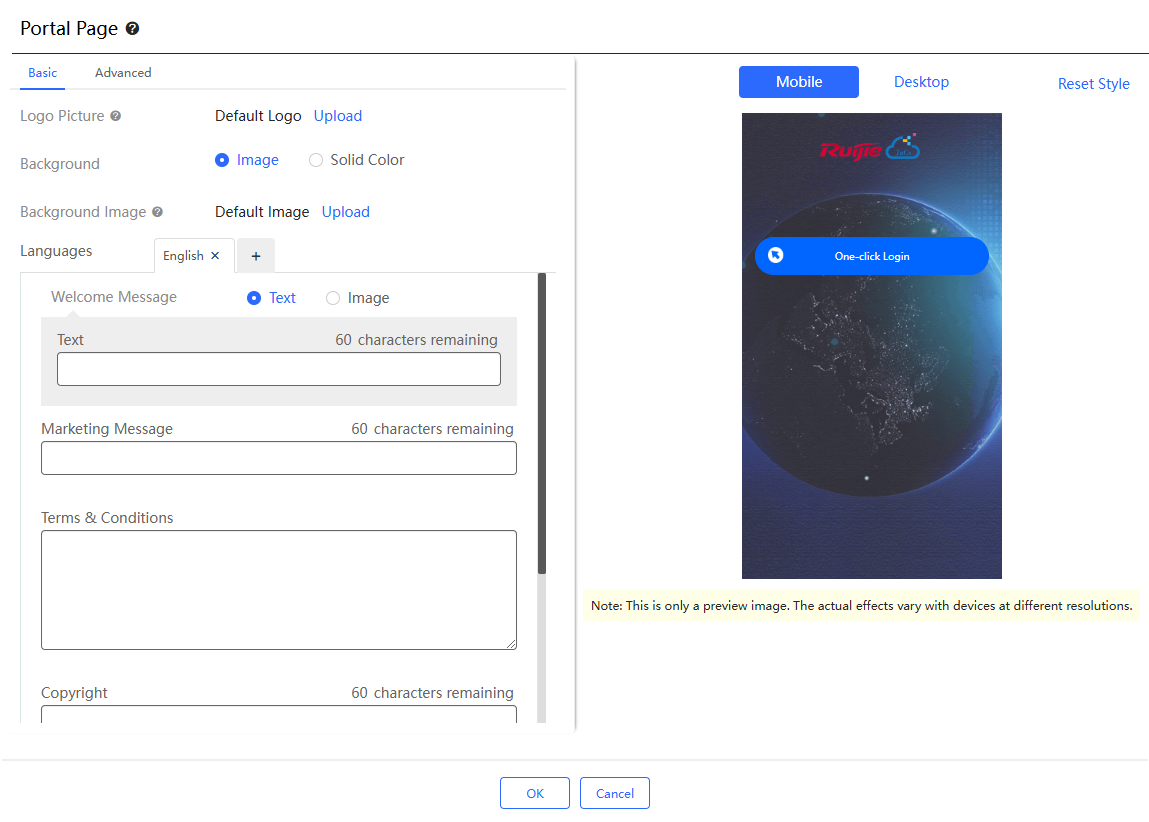
(1) Login Picture: Set the logo to be displayed on the login interface. If no logo image is uploaded, the system logo will be used by default. Supported image formats: tif, pjp, jfif, ico, tiff, gif, svg, xbm, jxl, jpeg, svgz, jpg, webp, png, bmp, pjpeg and avif.
(2) Back ground: Set the background image for the login interface. The default setting image is used. If you need to customize the background image, click Upload to upload a new one. If you need to set a solid color background, click Solid Color and select the background color.
(3) Languages: Set the language of the authentication interface and the information displayed on the authentication interface. Support setting welcome message, marketing information, terms and permissions, as well as copyright information. Currently, up to three languages can be set each time. User can switch the language using the language switch icon in the upper right corner of the authentication interface.
Advanced settings interface:
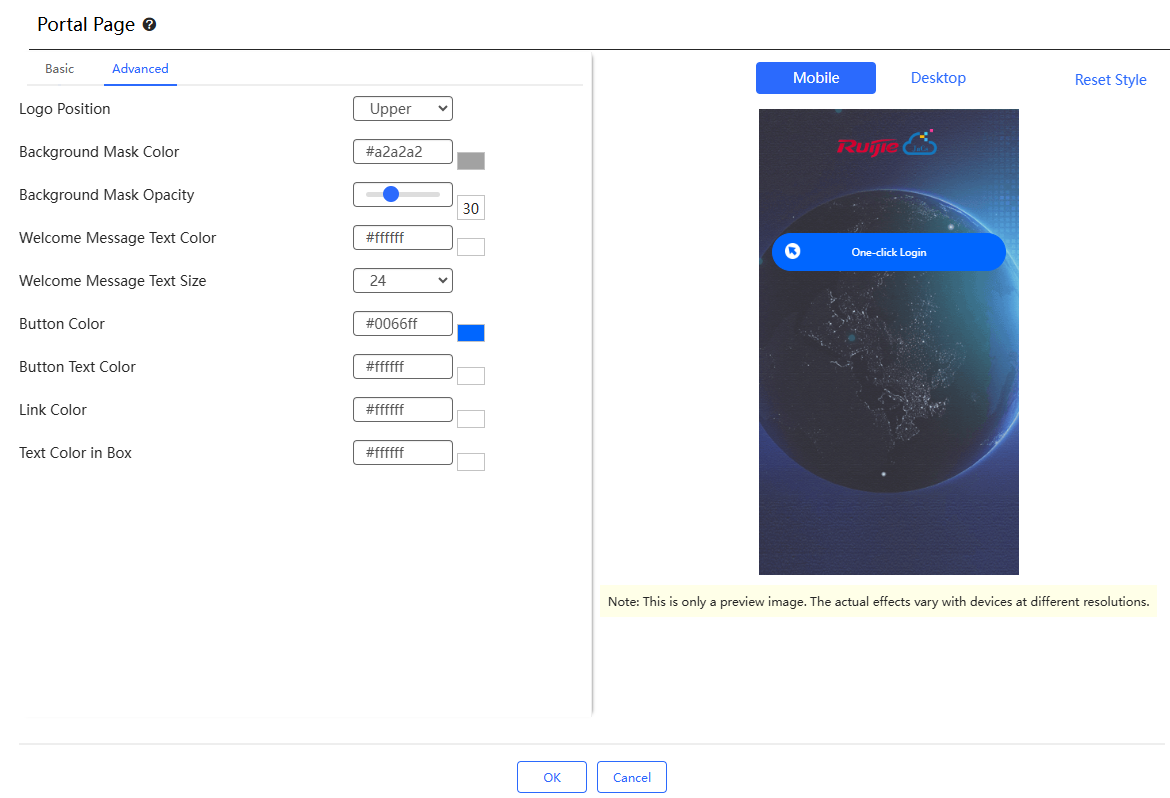
(1) Log Position: Set the logo position on the authentication page. Defaults: upper; Options: Upper/Middle/Lower
(2) Background Mask Color: Set the background mask color; Defaults: #a2a2a2
(3) Background Mask Color: Set the background mask transparency; Defaults: 30
(4) Welcome Message Text Color: Set the welcome message text color; Defaults: #fffff
(5) Welcome Message Text Size: Set the font size of the welcome message text; Defaults: 24
(6) Button Color: Set the button color. Defaults: #0066ff
(7) Button Text Color: Set the button text color. Defaults: #fffff
(8) Link Color: Set the link color. Defaults: #fffff
(9) Text Color in Box: Set the color of the text in the box. Default: #fffff
Step 5: After configuring the authentication interface, you can preview the it on the right. If you need to reset the interface, click Reset Style. Otherwise, click Save directly.
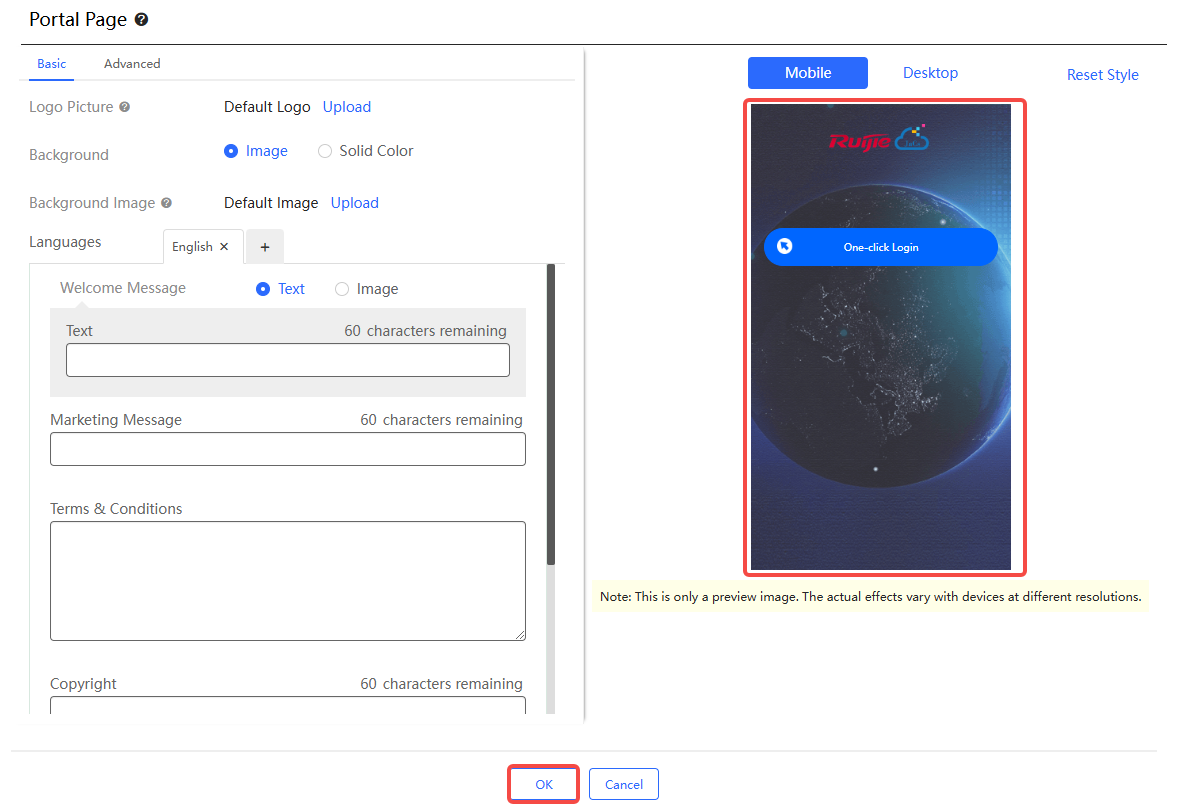
Step 6: After creating a new Captive Portal, you need to select the portal interface and click OK to complete the operation.

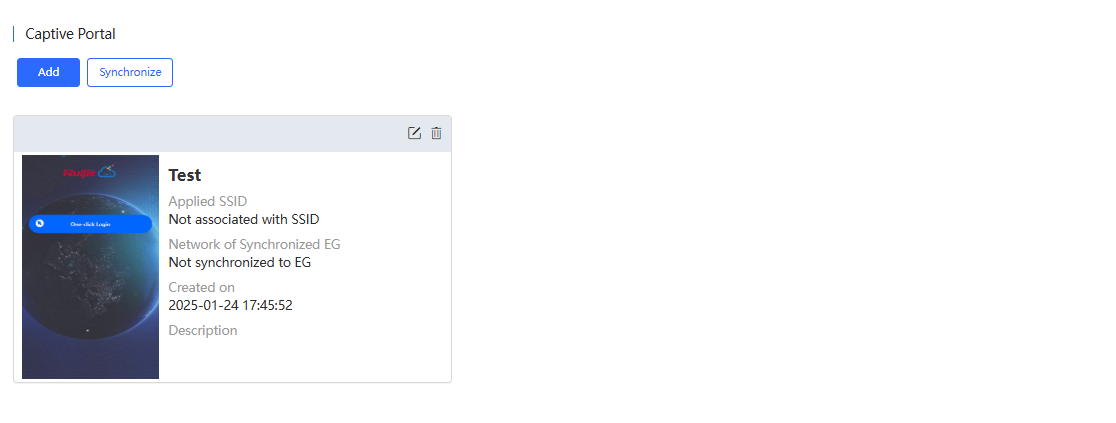
Click Auth&Account > Captive Portal to enter the Captive Portal management interface. All created Captive Portals will be displayed here. Click  and
and  in the upper left corner of the authentication portal to edit or delete it. If you need to synchronize the captive authentication portal to the EG product, click Synchronize. If the portal has been associated with an SSID or has been used in an EG product, you must cancel the association before deleting it.
全部评论