Voucher authentication is a simple portal authentication. Voucher authentication on Ruijie JaCS allows you to create access codes to guest for passing authentication and accessing wireless network. The number of concurrent users, network access duration and network speed limit and fees can be customized and offered to your guests.
The specific configuration steps are as follows:
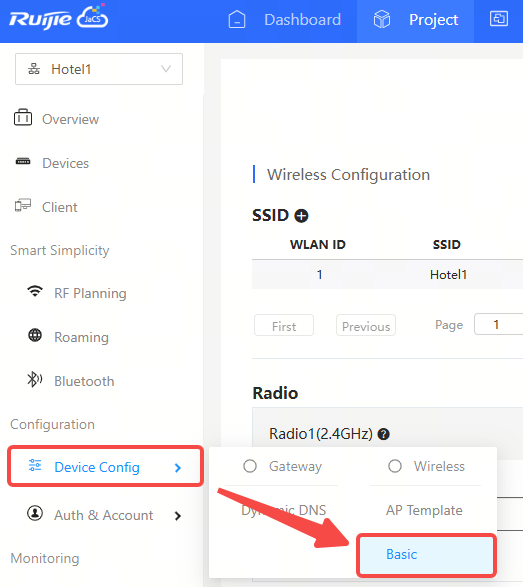
Step 1: Select the project to be configured, and click Device Config > Basic.
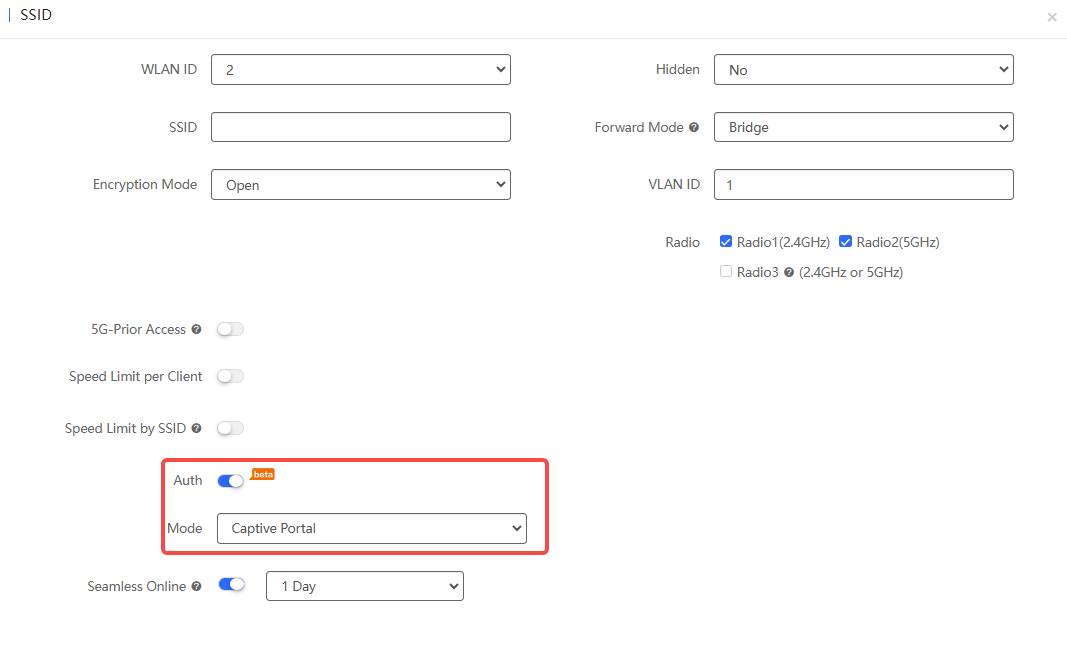
Step 2: Click to add a new SSID or click icon to edit an existing SSID. Enable the authentication function, and set the authentication mode to Captive Portal.

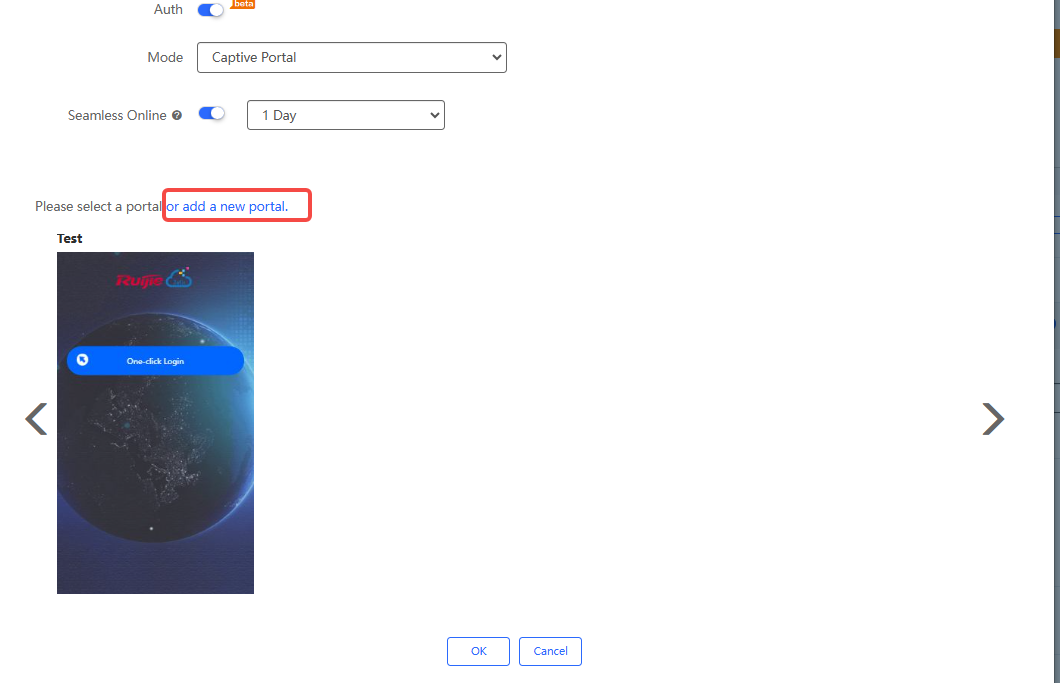
Step 3: Select an exsisting portal or click "or add a new portal", and fill in the basic portal information, including name, description, login options (remember to select Voucher in the login options), and authentication address, etc., and click Save to save the portal settings. For detailed introduction to the items in the captive portal setting page, refers to the "Configuring Captive Portal".
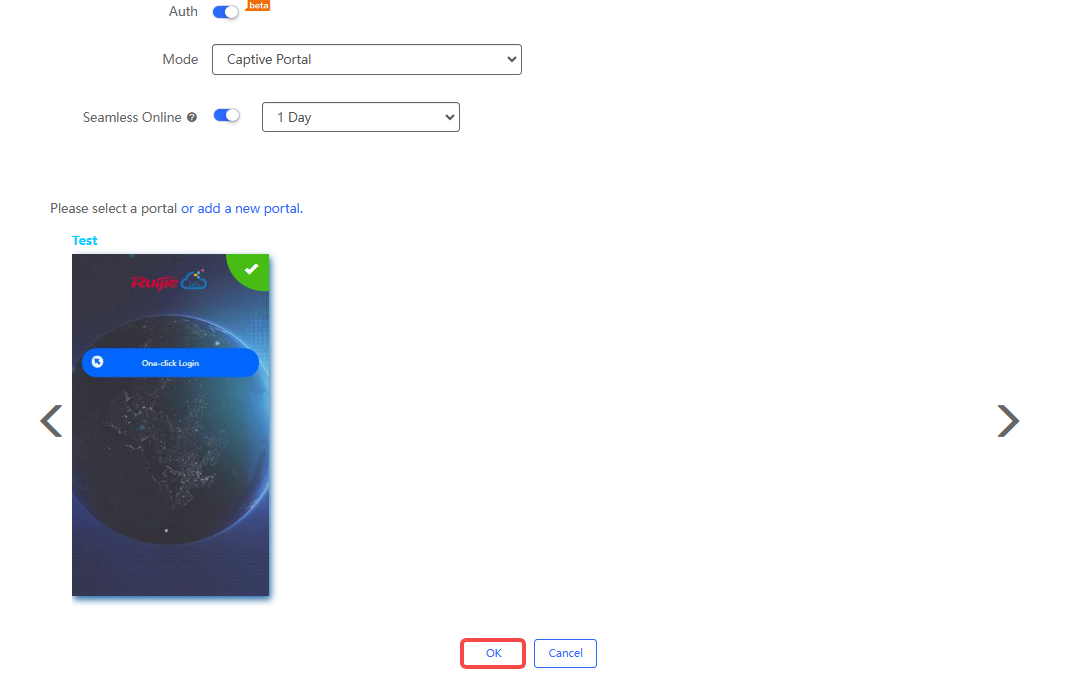
Step 4: After setting the authentication interface, check the portal and click OK to complete the setting.

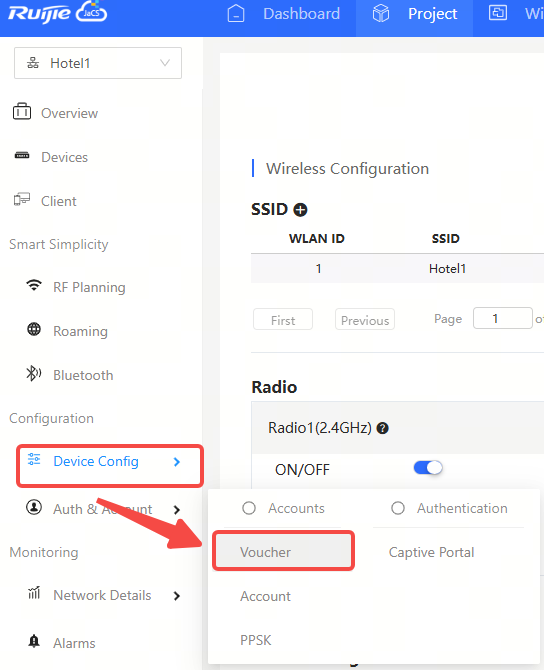
Step 5: Click Auth & Account > Voucher to go to the voucher management interface.
Step 6: Click Manage Package to enter the management interface, click Add Package to add a package and then click OK.


(1) Package Name: Required. Enter a package name. Up to 32 characters is supported. Numbers, letters, and underscores are supported to be contained.
(2) Description: Optional. Set the description of the voucher.
(3) Price: Optional. Set the charge price. Support entering a price with two decimal places, and the maximum value is 100,000,000.00.
(4) Concurrent Devices: Set the number of concurrent clients. The default value is 3. Options: Unlimited /1/2/3/4/5/6/7/8/9
(5) Bind MAC: Disabled by default. When it is enabled, the voucher code used by a device will be bound with its MAC address.
(6) Period: Set the validity period. During this validity period, the client is allowed to use the code to access the network. Defaults: 30 minutes. Options: Unlimited/30 minutes/1 hour/2 hours/1 day/2 days/1 week/2 weeks/30 days/Custom.
(7) Data Quota: Set the data quota. Defaults: 100MB. Options: Unlimited/ 100M/200M/500M/1G/2G/Custom
(8) Download Speed: Set download speed limit. Defaults: Unlimited. Options: Unlimited/256 Kbps/512 Kbps/1 Mbps/2 Mbps/5 Mbps/10 Mbps/Custom
(9) Upload Speed: Set the upload speed limit. Defaults: Unlimited. Options: Unlimited/ 256 Kbps/512 Kbps/1 Mbps/2 Mbps/5 Mbps/10 Mbps/Custom
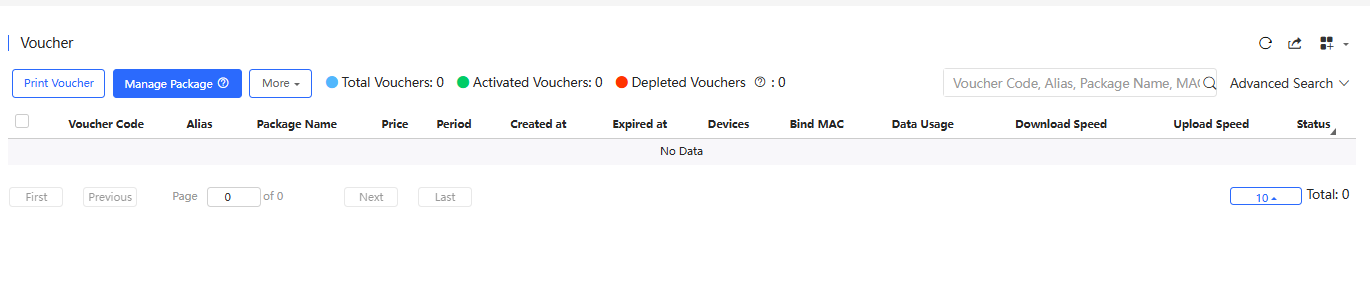
Step 7: After configuration, the package will be displayed in the list. Click Voucher to return to the voucher management interface.

Step 8: Click Print Voucher to enter the voucher printing interface. The printing interface supports printing single or multiple vouchers.

Print a single voucher:
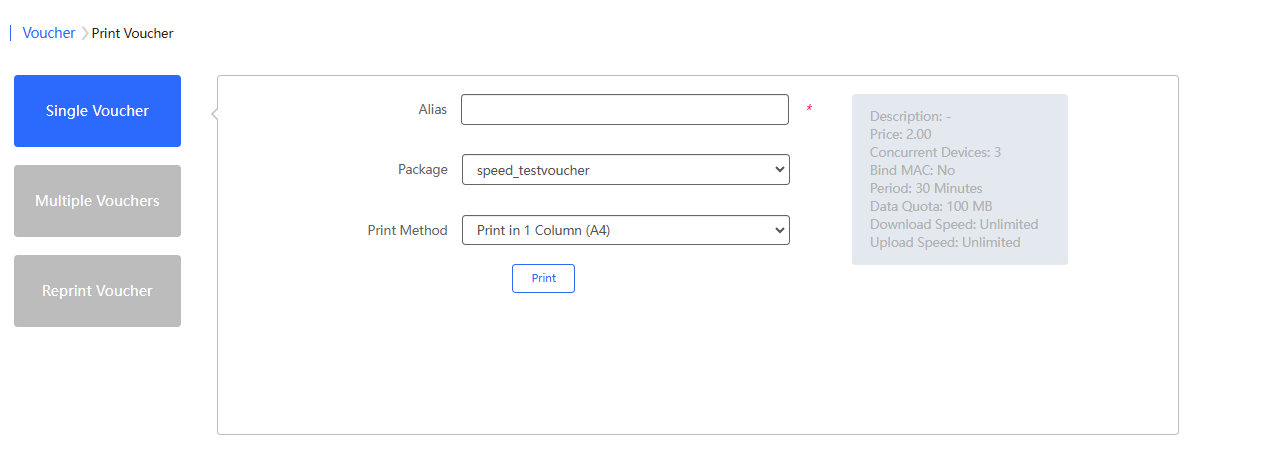
(1) Alias: Up to 20 characters are supported.
(2) Package: Select the voucher package you want to print.
(3) Print Method: Defaults: Print in 1 Column (A4). Options: Print in 1 Column (A4)/Print on POS Receipt
Print multiple vouchers:

(1) Quantity: Required. Set the number of packages to be printed. A maximum of 100 packages can be printed at a time.
(2) Package: Select the voucher package you want to print.
(3) Print Method: Defaults: Print in 1 Column (A4). Options: Print in 1 Column (A4) / Print on POS Receipt
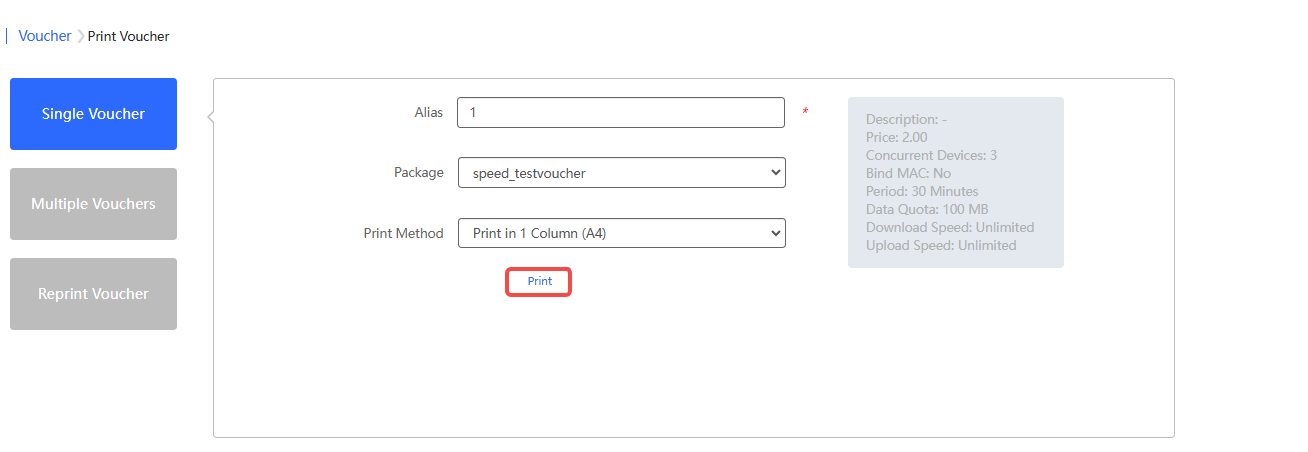
Step 9: After setting, click Print and a preview of the voucher will appear. After confirmation, click Print (the interface here is a preview of printing multiple vouchers).
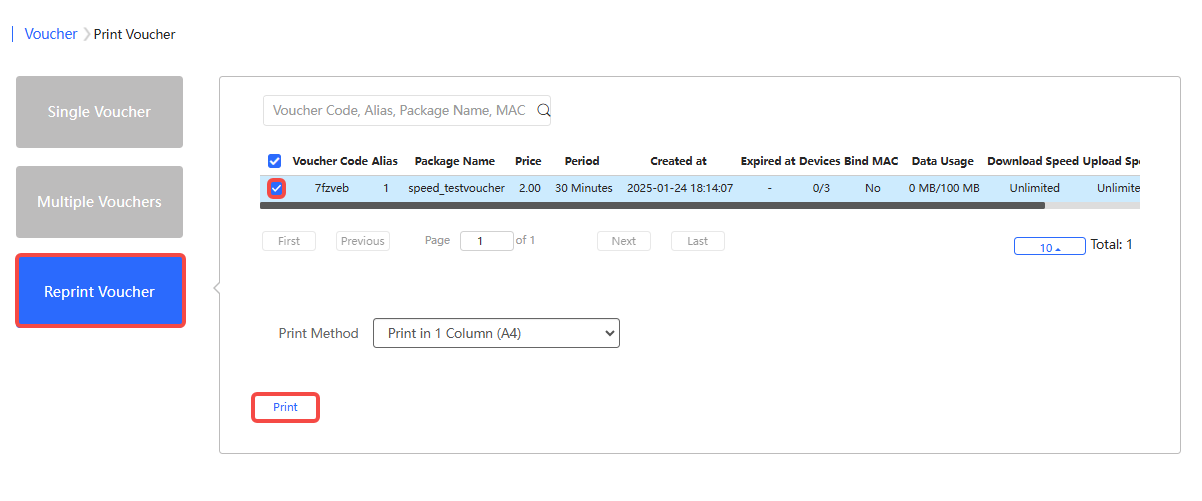
After printing, the voucher codes can be distributed to users, so that they can use the codes to pass authentication and access the network. If you need to reprint a previous voucher package, you can search for the previously printed voucher by voucher code, alias, voucher name, or bound MAC address, and select it, and then click Print to print it again.
All printed voucher package will be displayed in the Voucher list. When the MAC binding is enabled on a package, you can bind a device’s MAC address with the voucher code. When the voucher status is activated or exhausted, you can click  in the Bind MAC column to unbind the MAC address.

Click More to delete the selected print records, or change the print method.

全部评论